

How to Test WiFi Signal Strength in Your UK Home
- Craig Marston
- Oct 19, 2025
- 15 min read

Updated: Oct 20, 2025
Before you can fix a patchy connection, you need to know exactly what you’re dealing with. The quickest way is to just glance at the Wi-Fi icon on your device, but for a proper diagnosis, a dedicated analyser app will give you the detailed metrics you need. This is how you start pinpointing those frustrating weak spots.
Why a Strong WiFi Signal Is No Longer a Luxury

Let's be honest, slow Wi-Fi has moved beyond being a minor inconvenience. These days, it’s a genuine barrier to getting things done. Here in the UK, our reliance on a solid internet connection has absolutely exploded. It's the backbone of our daily lives, from remote work video calls and streaming in ultra-HD to managing the ever-growing collection of smart home gadgets.
We've all been there: the video buffers right at the best part of a film, a call drops mid-sentence during an important meeting, or the smart speaker stubbornly ignores you. More often than not, these are just symptoms of a weak or unstable Wi-Fi signal – a problem this guide will help you diagnose and finally solve.
The New Standard of Connectivity in UK Homes
As broadband technology has evolved, so has the need to properly test our own networks. The demand for better performance has been met with huge infrastructure upgrades across the country. In fact, an incredible 70% of UK homes – that’s around 20.8 million premises – now have access to gigabit-capable connections. It's a massive leap from just 47% back in late 2021, mostly thanks to the rollout of full-fibre from major providers.
With such powerful internet coming into our homes, the bottleneck often shifts from the provider's line to our internal network. Put simply, you could be paying for amazing speeds that never actually make it to your devices because of poor signal strength. This guide will show you how to get a grip on your network's performance, whether you're a complete beginner or a seasoned tech enthusiast.
We’ll cover everything from simple checks on your phone to more advanced techniques like creating a detailed heatmap of your property. Understanding these tools is the first step toward fixing the root cause of your connectivity issues for good.
A stable connection isn't just about speed; it's about reliability. A certified, tested network delivery ensures that every device, in every room, gets the consistent performance it needs without unexpected dropouts or slowdowns.
Pinpointing the Problem for a Lasting Solution
By learning how to test your Wi-Fi signal strength, you can finally move beyond guesswork. You'll be able to identify specific dead zones in your home, get a real sense of how far your WiFi should reach, and even see if interference from your neighbours' networks is causing problems. With this knowledge, you can make smart, informed decisions to improve your setup.
That might mean simply repositioning your router, switching to a less crowded channel, or deciding to invest in a more advanced solution. As an Excel network accredited partner, we know that a proper network assessment is the foundation of reliable connectivity. It's why our installations are often backed by a 25-year equipment warranty for complete peace of mind.
Right, let's get started on diagnosing your network.
Decoding Your Wi-Fi Signal Metrics

Before you can start fixing your Wi-Fi, you need to speak its language. The testing tools you’ll use will throw a lot of jargon at you—terms like dBm, RSSI, and SNR. They might look technical, but getting your head around these core metrics is the first step to properly understanding what’s going on with your network.
Think of it like a car's dashboard. The speedometer is easy enough to read, but knowing what the oil pressure and temperature gauges mean gives you a much clearer picture of the engine's health. It’s the same with Wi-Fi; these numbers empower you to make the right fixes.
Understanding Signal Strength: RSSI and dBm
The first and most common metric you'll see is the Received Signal Strength Indicator (RSSI), measured in decibels-milliwatts (dBm). Now, this can be a bit strange at first because it’s measured in negative numbers.
The key takeaway is this: the closer your dBm value is to 0, the stronger your signal.
A signal of -50 dBm is fantastic, giving you a fast and stable connection. But if you see a signal of -85 dBm, it’s incredibly weak, and you’re probably about to lose your connection completely. Just remember it's an inverted scale where a "higher" number (one that's less negative) is always better.
Any professional network assessment, whether it’s for a new fibre cable installation or just a routine health check, starts with RSSI. A properly certified network delivery depends on getting these values right across the entire site.
In the real world, this is incredibly useful. If your video call keeps freezing in the boardroom, a quick check might show the signal is -78 dBm. By simply moving a few metres closer to the access point, you might see that jump to -60 dBm, and just like that, the problem is solved. That's the power of understanding what you're looking at.
Signal-to-Noise Ratio: SNR
A strong signal is great, but it’s only half the battle. That signal also needs to be clear. This is where the Signal-to-Noise Ratio (SNR) comes in. It measures how much stronger your Wi-Fi signal is compared to any background interference, or "noise." This noise could be from your neighbour's Wi-Fi, a microwave oven, or even dodgy electrical wiring.
Imagine trying to have a chat in a quiet library versus at a loud rock concert. Your voice (the signal) is easily heard in the library. At the concert, even if you shout, the overwhelming noise makes it impossible for anyone to understand you. SNR is the exact same principle for your Wi-Fi.
For SNR, a higher value is always better because it means your signal is easily overpowering the background noise. A low SNR will cause slow speeds and dropouts, even if your RSSI reading seems okay.
Latency and Jitter
Finally, we have two metrics that are absolutely critical for real-time activities like video calls and online gaming: latency and jitter.
Latency (or Ping): This is the time it takes for data to get from your device to a server and back again. It’s measured in milliseconds (ms), and lower is always better. High latency is what causes that annoying lag.
Jitter: This measures how much your latency varies over time. A consistent delay is manageable, but high jitter means the delay is unpredictable, which is what causes stuttering audio and garbled video on a call.
A professionally designed network from an Excel network accredited partner is built from the ground up to keep both latency and jitter to a minimum. Backed by a 25-year equipment warranty, the entire focus is on delivering stable, long-term performance—which is exactly what these two metrics show.
Quick Guide to WiFi Signal Metrics
Use this reference to quickly understand the key numbers you'll see when testing your WiFi performance.
Metric | What It Measures | Excellent | Good | Poor |
|---|---|---|---|---|
RSSI | Signal strength (closer to 0 is better) | -55 dBm or higher | -56 to -70 dBm | -71 dBm or lower |
SNR | Signal clarity over background noise | 40 dB+ | 25 to 39 dB | 24 dB or lower |
Latency | Round-trip data travel time | < 20 ms | 21 to 50 ms | 51 ms+ |
Jitter | Variation in latency | < 5 ms | 6 to 15 ms | 16 ms+ |
Having this table handy will make it much easier to diagnose issues as you move around and test your network coverage.
Quick WiFi Checks on Your Phone or Laptop
Before you start digging into complex software, the best place to begin is with the devices you use every day. Your phone and laptop have some surprisingly useful, built-in tools for a quick health check on your Wi-Fi signal. These methods give you an immediate snapshot of your network's performance, perfect for anyone who just wants a simple baseline reading.
Think of it as a preliminary diagnosis. If you’re feeling unwell, you might check your temperature before calling a doctor. In the same way, these fast checks can tell you if a problem actually exists before you dive any deeper.
This simple process shows how to go from a basic check to a more detailed analysis using a dedicated app.
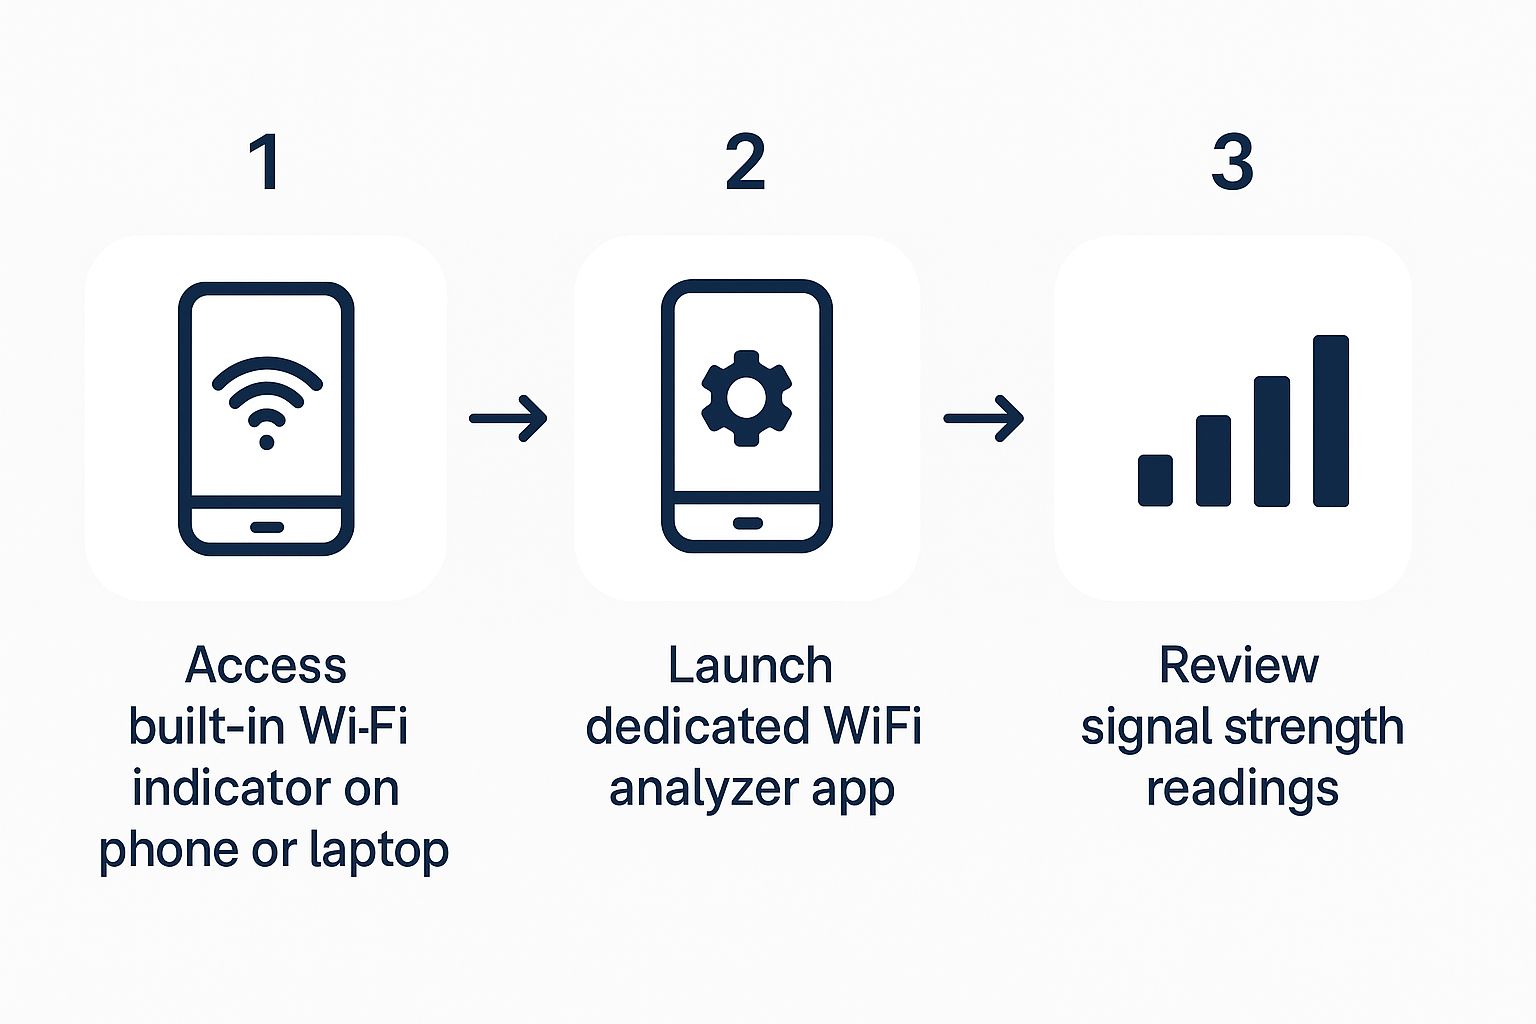
This just illustrates the logical next step: moving from your device's built-in signal indicator to launching a proper analyser app for more precise readings.
Checking Signal Strength on Your Operating System
Every device has a basic signal indicator—usually that familiar fan-shaped icon in your menu bar. While it gives a rough idea, you can often dig a little deeper for a more precise measurement without installing a single thing.
For macOS users, there's a handy hidden feature. Just hold down the Option key on your keyboard and click the Wi-Fi icon in your top menu bar. This brings up a detailed dropdown menu showing your current RSSI value, which, as we learned, is a direct measure of your signal strength in dBm. It’s an excellent way to get a real-time number as you move from room to room.
On Windows, this information is a bit more buried. You'll need to poke around in your network settings to view the connection properties, which sometimes shows signal quality as a percentage. It's not quite as direct as a dBm reading, but it still gives you a better view than the simple five-bar icon.
A certified, tested network delivery from a professional installer aims for excellent RSSI values (ideally -65 dBm or better) in all required areas. These quick checks are a great way to verify that performance long after the initial fibre cable installation is complete.
Going Deeper with Mobile Analyser Apps
To get a truly useful picture of your network’s health, you’ll want a dedicated analyser app. These free or low-cost applications turn your phone into a powerful testing tool, giving you far more detail than any built-in utility. They are absolutely essential for anyone serious about figuring out how to test Wi-Fi signal strength effectively.
For Android users, an app like WiFi Analyser is a fantastic choice. It gives you a real-time graph showing the signal strength of all nearby networks, so you can instantly see how yours stacks up against the neighbours'. More importantly, it shows which channels are most congested—a very common cause of slowdowns.
For iPhone and iPad users, Apple’s restrictions mean apps can't access Wi-Fi data quite as freely. You can, however, use Apple's own AirPort Utility app. You just need to enable "Wi-Fi Scanner" in the app's settings (via your device's main Settings app), and then you can perform scans that reveal the RSSI and channel for all networks in range.
Putting It All Together for Practical Insights
Using these apps is straightforward. Just open one up and start walking around your home or office, paying close attention to how the dBm value changes.
Map Your Dead Zones: Walk to the areas where your Wi-Fi feels slowest. Check the RSSI reading. Is it dropping below -75 dBm? You’ve just found a weak spot.
Check for Interference: Look at the channel graph. If your network is on the same channel as several strong neighbouring networks, that congestion is almost certainly hurting your performance.
Test Different Bands: Most modern routers broadcast on both 2.4 GHz and 5 GHz bands. Use the app to check the signal strength of each one in different locations.
This process provides data you can actually act on. Accuracy in testing Wi-Fi signal strength in the UK is vital as connection speeds rise. The average fixed line broadband download speed across the UK has reached 110 Mbps as of 2025, significantly faster than the global average. This performance is often delivered via full-fibre, but you'll only experience those gigabit speeds indoors if your Wi-Fi signal is strong and clear. You can learn more about the latest UK performance insights from these broadband statistics.
For businesses, ensuring this level of performance is critical. As an Excel network accredited partner, we conduct these tests on a professional scale to guarantee that every corner of an office is covered, often backing our work with a 25-year equipment warranty for lasting peace of mind. Your simple phone check is the first step in that same quality assurance process.
Creating a Wi-Fi Heatmap of Your Home
Checking the signal bars on your phone is a decent first step, but for a truly definitive picture of your network's performance, you need to see the whole board. This is where Wi-Fi heatmapping comes in. It takes you beyond a simple number in one spot and creates a detailed, visual, colour-coded map of your signal coverage across an entire area.
A heatmap is the ultimate diagnostic tool. It leaves no room for guesswork, showing you exactly where your signal is strong, where it's starting to fade, and where it disappears entirely. For larger homes, older buildings with thick stone walls, or any business needing flawless coverage, this method is invaluable.
What Is a Wi-Fi Heatmap and How Does It Work?
A Wi-Fi heatmap is simply a visual representation of your wireless signal strength laid over a floor plan of your property. Using specialised software, like the popular tool NetSpot, you systematically measure the signal at various points in each room. As you walk around and take readings, the software plots this data onto your map.
The result looks a lot like a weather map:
Green areas show where the signal is excellent and reliable.
Yellow and orange areas indicate a good to adequate signal.
Red or blue areas pinpoint weak spots and dead zones with poor or no connectivity.
This visual approach is incredibly powerful. It’s one thing to know the signal feels weak in the kitchen; it's another to see a precise red blob over the exact corner where your video calls always drop.
For businesses, this level of detail is crucial for planning new network deployments or troubleshooting existing ones. Professional site surveys often begin with creating a detailed heatmap to establish a performance baseline. To see what’s involved in a commercial setting, you can explore the process of a comprehensive asset survey and see how professionals map out entire buildings.
A Real-World Example: Mapping a UK Home
Let's imagine a common scenario: mapping a typical two-storey UK home to figure out why the upstairs office has such a patchy connection. The process is pretty straightforward.
First, you need a basic floor plan of your house. Don't worry, this doesn't need to be an architect's blueprint. A simple sketch you've drawn yourself and scanned, or even a digital file from a property listing, will work perfectly well. You just upload this image into an application like NetSpot to use as your canvas.
Next, you start the survey. Beginning on the ground floor near your router, you tell the software where you are on the map and it takes an initial signal reading. From there, you slowly walk around the entire floor, pausing every few steps to click your corresponding location on the map. At each point, the software records the signal strength (RSSI), noise levels, and other key metrics.
Once the ground floor is done, you simply head upstairs and repeat the exact same process.
For a professional fibre cable installation or network upgrade, this survey process is non-negotiable. An Excel network accredited partner uses enterprise-grade tools to perform these surveys, ensuring that the final certified, tested network delivery meets specific performance criteria, often guaranteed by a 25-year equipment warranty.
Interpreting the Heatmap Results
After you've finished walking the property, the software crunches all the data points and generates your heatmap. In our two-storey home example, the map would likely show a strong green circle radiating out from the router's location downstairs.
But as you look at the map for the upstairs, you might see the signal fading to yellow over the staircase and turning to a concerning red right over the home office. Now you have definitive proof of the problem. The map doesn't just tell you the signal is weak; it shows you exactly how weak it is and the precise physical area it affects.
You might also uncover issues you weren't even aware of. Perhaps there’s a surprising dead zone in a corner of the living room, shielded by a chimney breast, or weak coverage in the garden where you'd like to work on sunny days.
Armed with this visual evidence, you can finally make informed decisions. The heatmap might confirm that your single router just isn't up to the job, justifying the need for a mesh system or an additional access point. It provides the concrete data needed to solve your Wi-Fi problems effectively, moving you from guesswork and frustration to a clear, actionable plan.
From Test Results to Actionable Insights
You’ve gathered the data, seen the numbers, and maybe even generated a heatmap. So, what now? This is where the real work begins—turning that information into genuine, practical solutions for your Wi-Fi woes. The numbers and colours on your screen aren't just abstract data; they're clues pointing directly to the root cause of your connectivity problems.
This is the point where you have to connect the dots between your test results and the physical reality of your space. A weak signal isn’t just a random occurrence. It’s a symptom, and understanding what’s causing it is the key to choosing the right fix instead of wasting time and money on solutions that simply won't work.
Diagnosing Common Wi-Fi Problems
Let's walk through a few typical situations you might run into in a UK home or office. Once you identify which scenario fits yours, you can start to pinpoint the likely culprits behind your poor performance.
Weak Signal in a Specific Room: You've got a brilliant signal downstairs, but the loft conversion or home office is a total dead zone. This is almost always caused by physical obstructions. Materials like brick, concrete, and even modern insulated walls are notorious for soaking up or blocking Wi-Fi signals.
Slow Speeds Everywhere: Even when you’re standing right next to the router, performance is sluggish and frustrating. This often points straight to channel interference. In a block of flats or a busy office, you could have dozens of networks all fighting for the same Wi-Fi channels, creating a digital traffic jam.
Random Dropouts and Instability: The connection seems fine one minute and then drops out the next, especially during a video call. This is often the work of intermittent interference from household appliances like microwave ovens or even old cordless phones operating on the 2.4 GHz frequency.
Understanding these root causes is fundamental to any professional network project. When an Excel network accredited partner designs a system, the initial survey identifies these potential issues to ensure the final certified, tested network delivery is flawless from day one.
From Diagnosis to Solution
Once you have a strong idea of what’s causing the problem, you can start putting a plan together. For instance, if your heatmap clearly shows a dead zone in the loft, the issue is distance and obstruction. In that case, a mesh Wi-Fi system or a wired access point is a logical next step.
On the other hand, if your analyser app shows heavy channel congestion, the fix could be much simpler. Logging into your router's settings and manually changing the Wi-Fi channel to a less crowded one can often give you an immediate and dramatic performance boost.
The rapid expansion of gigabit-capable broadband, which now nears 88% of UK premises, has made this diagnostic step more critical than ever. With ultra-fast full-fibre connections becoming the norm, the bottleneck has shifted from the street cabinet to inside our own buildings. The quality of your indoor signal—dictated by router placement, building materials, and network interference—is what determines whether you actually get to use those incredible speeds. You can learn more about how UK gigabit coverage is expanding and why your internal network's health is so important.
For businesses, sorting these issues out is vital for productivity. A professional fibre cable installation is often just the beginning. The real value comes from a network that’s been expertly designed to overcome the unique challenges of the building, a commitment that’s often backed by a 25-year equipment warranty for complete peace of mind.
Proven Ways to Boost Your Wi-Fi Signal

You've done the diagnostic work and tested your network, which is the hard part. Now you're armed with the insights needed to make some real improvements. It’s time to turn that data into action, moving past generic advice to apply targeted fixes for the exact issues you’ve found, from irritating dead zones to disruptive signal interference.
Starting with the Fundamentals
Before you rush out and buy new hardware, it’s always best to optimise what you already have. You’d be surprised how much of a performance boost you can get from a few simple adjustments, and they won't cost you a penny.
First up, take a hard look at your router's placement. Wi-Fi signals radiate outwards from the router, a bit like ripples in a pond. If it’s tucked away in a cabinet or shoved in a corner of the house, you’re hamstringing it from the start. For the best coverage, place it in a central, elevated location, well away from thick walls, big metal objects, and appliances like microwaves that are known signal killers.
Next, get that router's firmware updated. Manufacturers regularly release updates that patch security holes, but they often include performance and stability improvements too. Most modern routers can update themselves automatically, but it never hurts to log into the admin panel and manually check for the latest version.
Finally, it's time to change your Wi-Fi channel. If your analyser app showed a lot of congestion on your current channel, this is a non-negotiable step. Log into your router's settings and switch from "Auto" to a manually selected channel. For the crowded 2.4 GHz band, stick to channels 1, 6, and 11. These are the only three that don't overlap, which is key to minimising interference from your neighbours' networks.
Choosing the Right Hardware Upgrade
Sometimes, no amount of tweaking your existing setup will cut it, especially in larger homes or buildings with tricky layouts. When you simply need to extend your network’s reach, you have a few hardware options, each with its own pros and cons.
Wi-Fi Extender: Often called a repeater, this is the most straightforward solution. It grabs your existing signal and rebroadcasts it further. The downside? This convenience comes at a price—it typically halves your available bandwidth, which can create a new performance bottleneck.
Mesh Wi-Fi System: For truly seamless coverage, a mesh system is a much better bet. It uses multiple nodes placed around your property that work together as a single, intelligent network. As you move about, your phone or laptop will automatically hop to the strongest node without dropping the connection. This makes it a fantastic solution for larger, multi-storey homes.
Powerline Adapters: These offer a clever way around signal-blocking walls by using your home's electrical wiring to carry the network signal. One adapter plugs in near your router, and the other creates a new Wi-Fi hotspot in another room. They can be incredibly effective where thick brick or concrete walls make traditional Wi-Fi a nightmare.
When to Call in the Professionals
While DIY fixes can solve plenty of common Wi-Fi headaches, there are times when you need a professional approach to guarantee performance, particularly in a business setting. If you're trying to cover a large office, a complex building, or need absolutely flawless connectivity for critical operations, it's time to bring in the experts.
A professional network assessment is much more than a simple signal check. An Excel network accredited partner conducts a thorough site survey to design a robust, reliable system tailored to your building's unique layout, ensuring total coverage and peak performance.
Engaging a specialist ensures every component of your **network infrastructure** is planned and deployed correctly. This covers everything from a professional fibre cable installation to a certified, tested network delivery. This expertise doesn't just solve today's problems; it builds a stable foundation that’s ready for future growth. Crucially, this work is often backed by a comprehensive 25-year equipment warranty, giving you long-term peace of mind that your investment is protected.
Article created using [Outrank](https://outrank.so)
Comments